macOS
macOS Certificate Authentication
Export the Root CA Certificate from AD CS
- Open Microsoft Management Console (mmc.exe)
- Under “Files”, select “Add/Remove Snap-ins”
- Under the “Available snap-ins” column, select “Certificate”, and click “Add >”
- In the “Certificate snap-in” window that appears, select the “Computer account” radio button, and select for “Local computer” radio button in the next screen. “Finish” and click “Ok” to view the “Certificates” console
- To export the Root CA certificate, navigate to Trusted Root Certificates > Certificates.
- Look for the certificate with a common name of your configured CA. Right-click it and “Open”
- In the “Certificate” window that appears, under the “Details” tab, click “Copy to File…”
- Follow the wizard to export the certificate as a “Base-64 encoded X5.09 (.CER)
- Ensure that a prompt showing you “The export was successful.” appears once you are done with the export wizard
Importing Root CA Certificate into Workspace ONE Access
- To be able to perform Certificate Authentication, in Workspace ONE Access you will have to enable the authentication method. As such, login into the Workspace ONE Access tenant as a Tenant Admin.
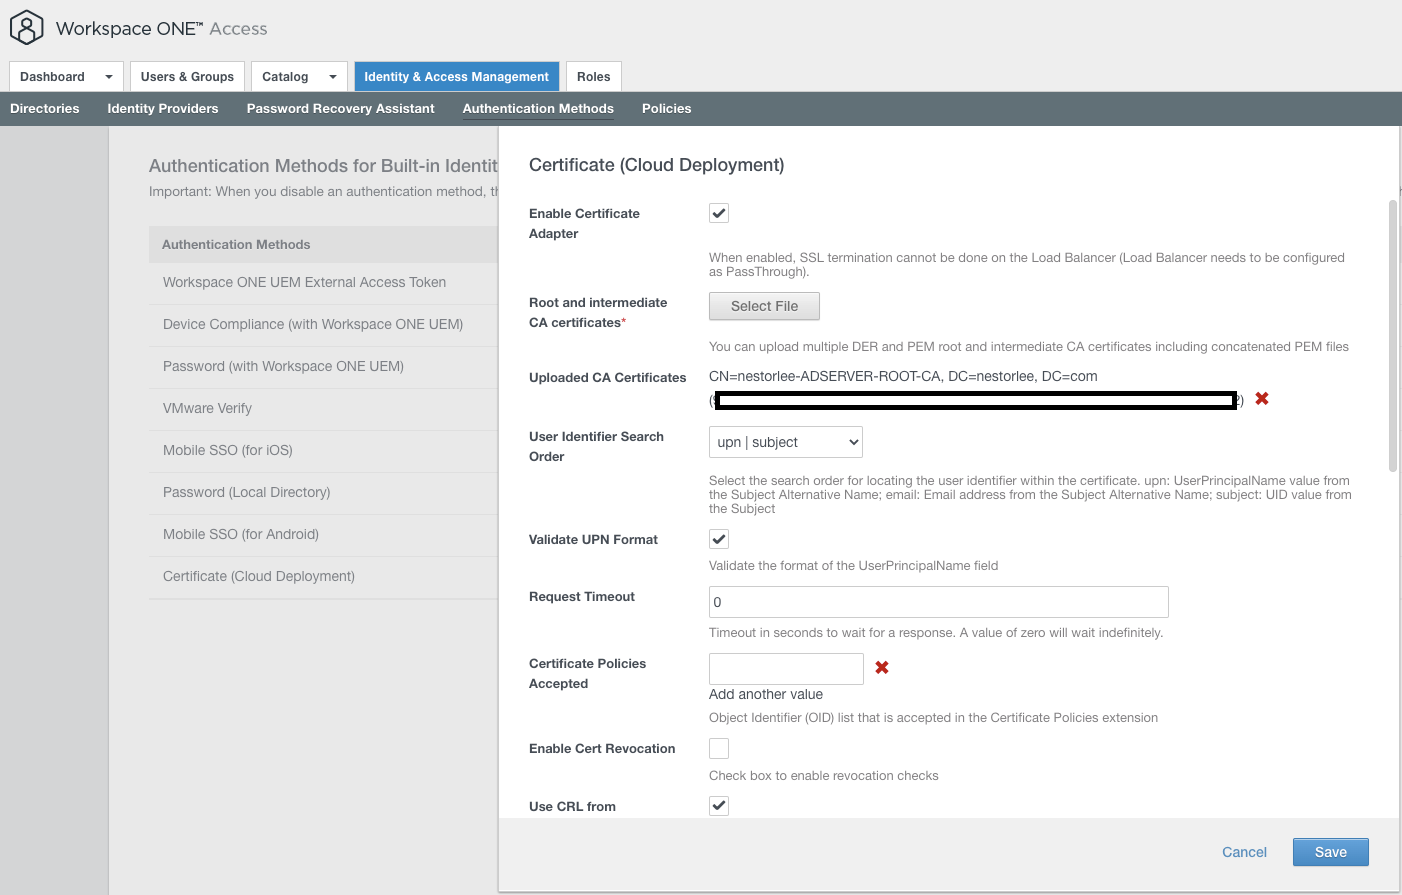
- Navigate to “Identity & Access Management > Authentication Methods”, and click the pencil next to “Certificate (Cloud Deployment)” to configure it
- Check the “Enable Certificate Adapter” checkbox
- Upload the Root CA Certificate we exported in Step 8 by clicking the “Select File” button under “Root and Intermediate CA certificates”
- Save the configuration. Check that the status of “Certificate (Cloud Deployment)” is now showing “Enabled”.
Allowing Authentication through Certificates

- To allow incoming Authentication requests using Certification Authentication, under “Identity & Access Management > Identity Providers > Built-in”, select the “Certificate (Cloud Deployment)” checkbox.
Configuring Access Policies
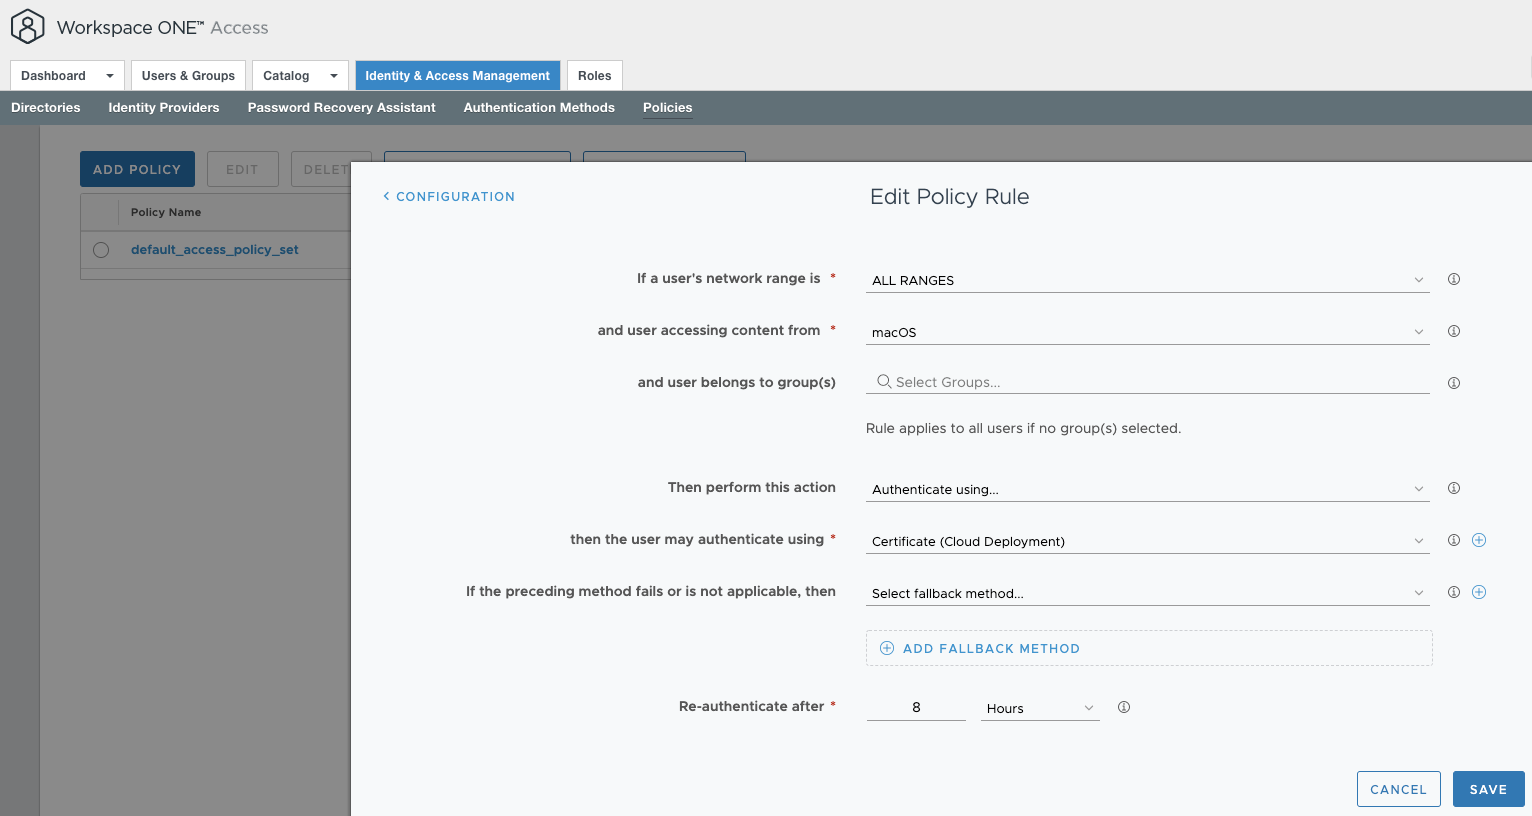
- The last step to perform in the Workspace ONE Access console would be to configure the Access Policies. Under “Identity & Access Management > Policies”, click the “Edit Default Policy” button.
- Under the “Configuration” section of the window that appears, create a new policy rule for users accessing content from macOS devices. Explicitly configure that they will authenticate using “Certificate (Cloud Deployment)”. Configure the fallback method as required.
- Save the configuration and return to the Workspace ONE UEM console
Create a macOS User Profile

- In the Workspace ONE UEM console, create a new macOS User Profile with a “Credentials” payload.
- In the “Credentials” payload, you will specify the Credential Source, the Certificate Authority, the Certificate Template, whether you want to allow access of the certificate to all applications, and if you want to allow the export of the private key from Keychain.
- Assign the policy to your group of macOS users which you want to authenticate via Certificate Authentication.
Test macOS Certificate Authentication SSO
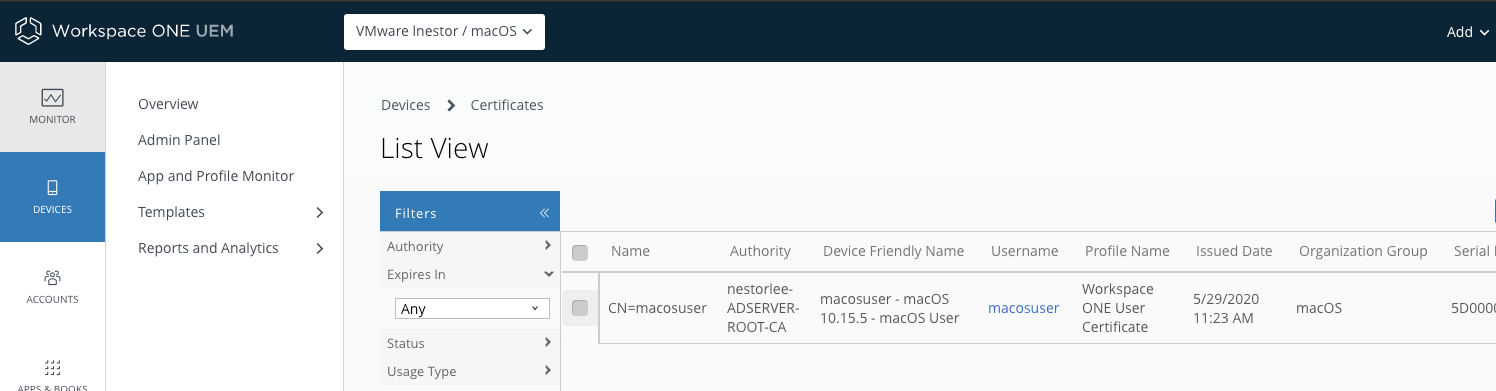
- To test out if your configuration is working as intended. You will need to first enroll your macOS devices. After enrollment, you should see the certificates assigned as listed under “Devices > Certificates > List View”
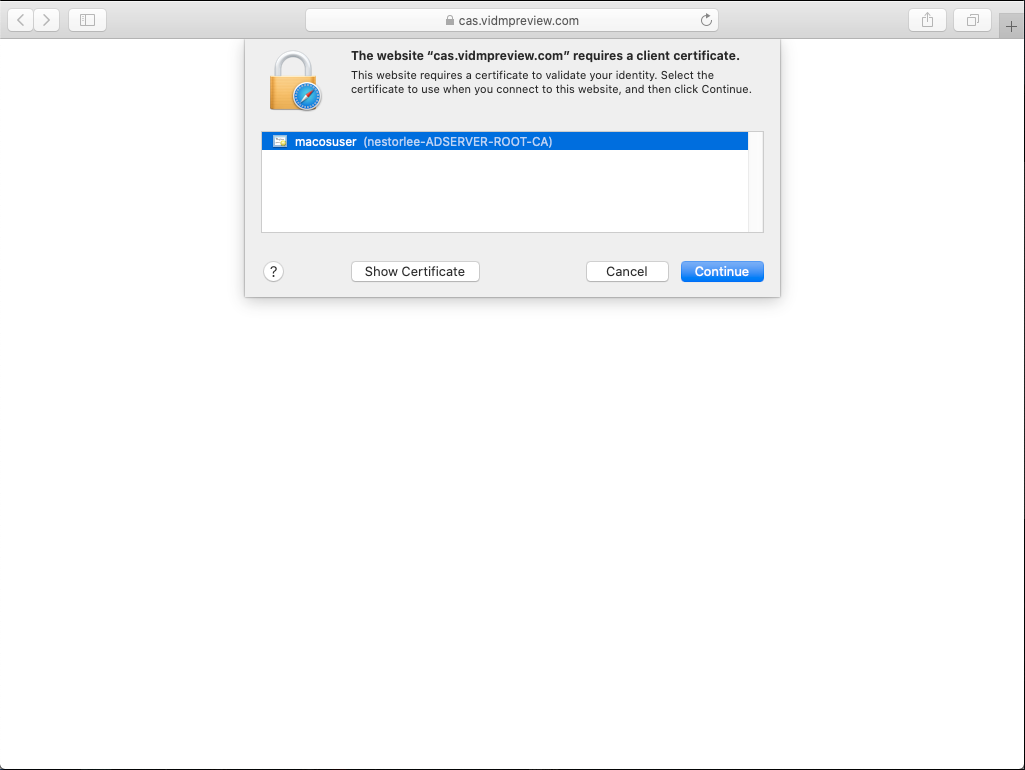
- Using the Workspace ONE App Catalog as an example, if you were to attempt to access it, it will prompt you to confirm the use of your certificate.
- If all is configured correctly, you should be able to access all your apps assigned once you confirm the use of your certificate for authentication.
With these 24 steps, you have configured macOS SSO using Certificate Authentication! Continue viewing the configuration steps for the various platforms supported by Workspace ONE UEM!