Installation & Integration
The first step of integrating your AD CS server with Workspace ONE UEM, is to of course, have your AD CS role setup. I’ve created videos for those who are more visual to guide them along the steps required.
Adding the AD CS Role
- Navigate to Server Manager
- Select “Add roles and features”
- For “Installation Type”, select “Role-based or feature-based installation”
- Select the server you want to install AD CS on
- Select the “Active Directory Certificate Services” Server Role to add
- Confirm to add the features required for AD CS
- On the AD CS Role Services, click the checkbox for “Certificate Authority”
- Confirm and allow AD CS to be installed
Post-deployment AD CS Configuration
- Navigate to Server Manager
- Click on the “Notifications” flag, and click to configure the Post deployment Configuration
- Select the account with sufficient privileges to install the CA role service
- Click on the “Certificate Authority” checkbox to install
- Confirm that you are installing an Enterprise CA
- You will need a Root CA, so check that you have clicked on the “Root CA” radio button
- “Create a new private key” if you do not have an existing one
- Choose your preferred cryptographic provider, the key length, and the hash algorithm. You will need to provide this information later.
- Enter a common name for your CA. You will need to provide this information later.
- Select the validity period for the Root CA cert
- Specify the Certificate Database location path
- Confirm the details, and click on “Configure” to install
Creating a Service Account for AD CS
- Navigate to Active Directory Users & Computers
- Under your domain, right click on the “Users” container, and under the “New” sub-menu, click User
- Create the service account by filling in the appropriate fields
Provide Permissions for Service Account
- Navigate to the “Certificate Authority” console
- Right-click the CA you configured, and click “Properties”
- In the “Properties” window that opened, under the “Security” tab, add the service account you’ve created in Step 23 to explicitly provide the required permissions
- For the service account, you will need to give it “Read”, “Issue and Manage Certificates”, and “Request Certificates” permissions
- Click Apply and Ok to confirm
Creating a Certificate Template
- Open a Command Prompt/PowerShell window to enter the following commands. These commands will allow the CA to use Subject Alternative Names (SAN) in their certs.
certutil -setreg policy\EditFlags +EDITF_ATTRIBUTESUBJECTALTNAME2net stop certsvcnet start certsvc- Navigate to the “Certificate Authority” console.
- Click the ‘+’ sign next to the configured CA to expand the sub-folders
- Right click on “Certificate Templates” and click “Manage”
- Locate the pre-defined certificate template named “User”, and right-click, and click on “Duplicate Template”
- In the Properties window that appears, there will be a number of items that needs to be changed.
- Under the “Compatibility” tab, select the oldest version of Windows Server you are using (to maintain backward compatibility)
- Under the “General” tab, enter the your desired display name, as well as the template name. Take note of the template name here as you will need it later.
- Under the “Request Handling” tab, select the purpose of the certificate. Ensure that the “Allow private key to be exported” checkbox is selected
- Under the “Subject Name” tab, click on the “Supply in the request” radio button. Click Ok to accept
- Under the “Extensions” tab, highlight “Application Policies”, click “Edit’, and click “Add”. Look for “Client Authentication” and click “Ok”.
- Under the “Security” tab, add the service account user created in Step 23 to explicitly provide it with permissions to Enroll the certificate.
- Click “Apply” and “Ok” to confirm the configurations. You should see the duplicated Certificate Template with the display name you configured in Step 36.
- Going back to the “Certificate Authority” console, right-click on the “Certificate Templates” sub-folder, and under “New”, select “Certificate Template to Issue”.
- In the “Enable Certificate Templates” window that appears, locate the Certificate Template you’ve just created in Step 41. Highlight it, and click “Ok”.
Integrating AD CS
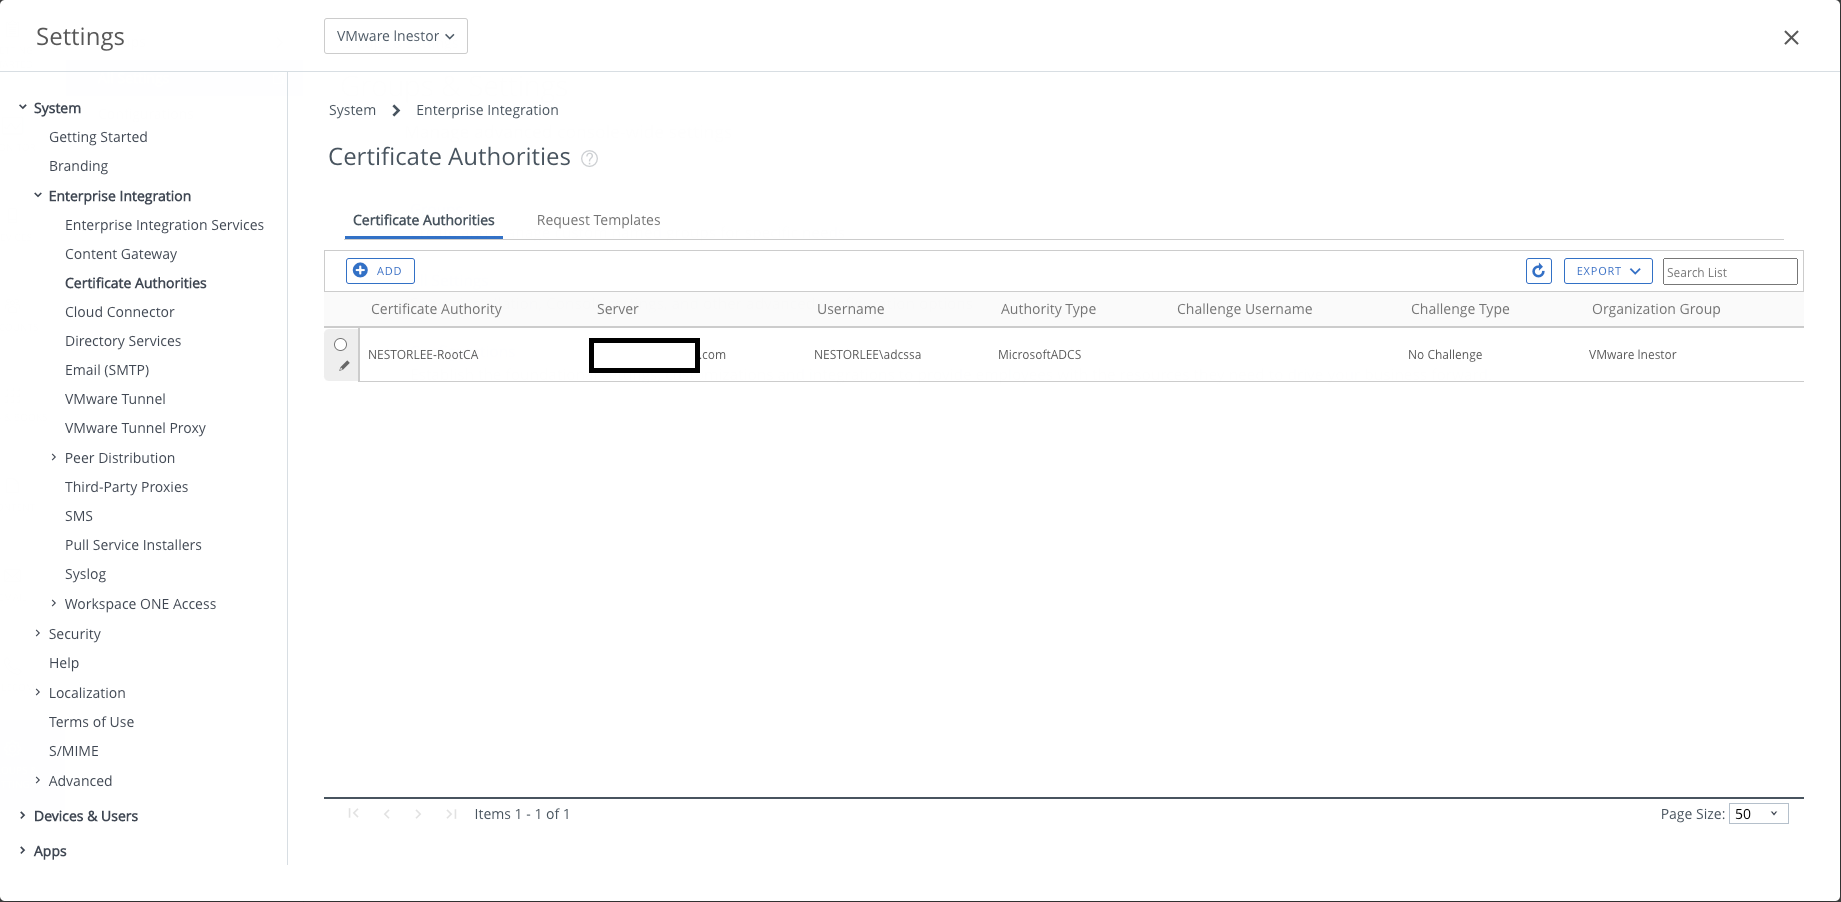
- Going back to the Workspace ONE UEM console, navigate to Groups & Settings > All Settings > System > Enterprise Integration > Certificate Authorities
- Click on “Add” to integrate a Microsoft AD CS server with Workspace ONE UEM
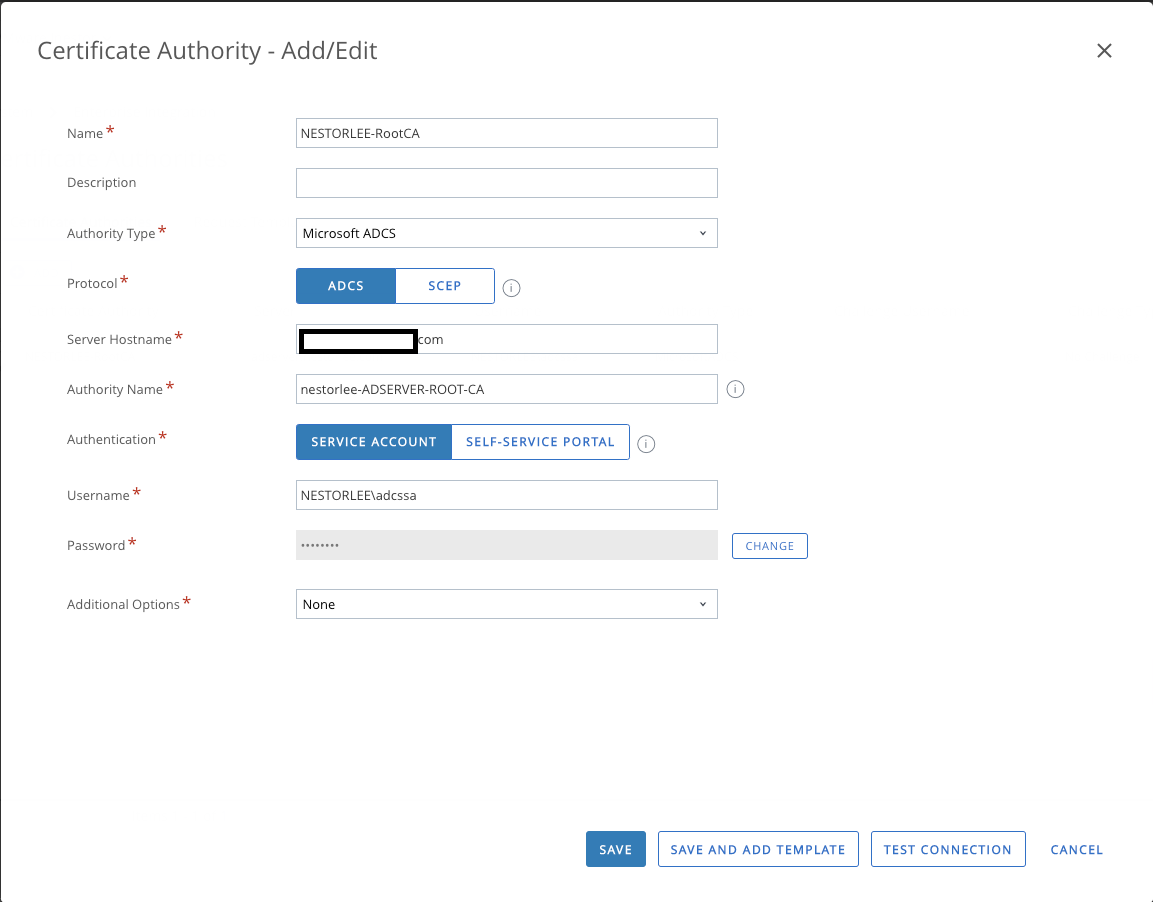
- Fill in the fields with the appropriate values in the “Certificate Authority – Add/Edit” window that comes up. Click on “Test Connection” after filling in the values. It should come up as successful.
| Certificate Authority Fields | Description |
| Name | The display name of the AD CS server in Workspace ONE UEM |
| Description | A description you can enter |
| Authority Type | Which CA you are using. AD CS in our case |
| Protocol | AD CS |
| Server Hostname | The hostname in which your AD CS server is located |
| Authority Name | The name you have provided in your Windows Server. Same name as provided in Step 17 |
| Authentication | Service Account |
| Username/Password | The credentials for your service account created in Step 23 |
| Additional Options | As required, but not needed |
Specifying Certificate Request Template

- After integrating the CA, you will need to specify the Request Template. At the same settings page, under the “Request Templates” tab, click on “Add”.

- Fill in the fields with the appropriate values in the “Certificate Template – Add/Edit” window that comes up. Click on “Save” after filling in the values.
| Certificate Template Fields | Description |
| Name | The display name for the Certificate Template |
| Description | A description you can enter for the Certificate Template |
| Certificate Authority | Choose the Certificate Authority you integrated with Workspace ONE UEM in Step 46 |
| Issuing Template | Enter the template name of the template you created in Step 36 |
| Subject Name | This is used to specify and identify the certificates created for each device |
| Private Key Length | The value of the Private Key Length should be the same as what you configured at Step 16 |
| Private Key Type | The checkboxes you click here should be the same as the ones you have chosen at Step 37 |
| Include Security Identifier (SID) in certificate | Enabling this automatically includes the SID attribute from LDAP in the certificate subject for added security |
| SAN Type | Used for additional unique identification of the certificate |
| Automatic Certificate Renewal | Choose appropriately if automatic certificate renewal if required |
| Auto Renewal Period | If enabling automatic certificate renewal, choose the auto renewal period. |
| Enable Certificate Revocation | Enable to automatically revoke certificate when devices are unenrolled |
| Publish Private Key | Choose appropriately if private key needs to be published |
| EKU Attributes | Specify Extended Key Usages (EKU) if required |
With these 48 steps, you have configured your on-premise Certificate Authority with Workspace ONE UEM! The next steps to configuring SSO for each device platform will be documented in the next pages!